

How To Install Windows 10 On Mac With Bootable Usb
Run Windows in your MacBook from an external USB Flash Drive in 6 steps
![]()

We all love MacBooks, the macOS is fast, highly optimized for the hardware and constantly updated by Apple. However, there are times when we need to use Windows OS for tasks that cannot be completed with macOS, like using Windows-only software and playing PC games. The most common ways of using Windows in MacBook are either having a Virtual Windows Machine or installing a guest OS on top of your MacBook via the Boot Camp Assistant. I am not a fan of these two as either solution will consume a certain amount of my precious SSD.
In t h is article, I am going to introduce another solution to install your Windows workspace in an external drive by leveraging the Windows To Go feature, so you can use Windows in your MacBook without installing any additional software or guest OS on it.
Step 1 Prepare the hardware
- An Intel-based MacBook
- A machine running Windows 7 or later (You can use Virtual Machines if you does not have one)
- A fast USB Flash Drive with at least 64GB storage ( I am using a SanDisk Ultra Fit 128GB)
- A USB thumb drive (Optional)
Step 2 Prepare the software
- A Windows Disk Image, you can use your MacBook to download one from the Microsoft Windows Disk Image Download page.
- Rufus, the Windows software to creates a bootable USB flash drive.
- Boot Camp Assist, it comes with macOS and we use it to download the Windows support software that needs to be installed in your Windows workspace
Step 3 Create the USB bootable flash drive
- Transfer the Windows Disk Image from your MacBook to Windows machine via the USB Flash Drive or the USB thumb drive.
- Launch Rufus application, locate USB Flash Drive from the Device drop-down list
- Select the Windows Disk Image iso file from the Boot Selection option
- Tick Windows To Go in the advanced format option, this is an important step, otherwise, Rufus will create a bootable flash drive for standard Windows installation on hard disk.
- Leave the rest of the options as default and hit the START button.
- Grab a coffee as the progress will take around 20–30 minutes
Step 4 Download the Windows support software
Before we go ahead and boot into Windows, let us download the Windows support software so the MacBook has the necessary drivers to work with the Windows OS
- Launch Boot Camp Assist from the Launchpad
- Click on the Download Windows Support Software from the Action menu

- Choose the download destination and transfer the downloaded files to the USB thumb drive
Step 5 Boot up MacBook with the USB flash drive
- Shut down your MacBook completely
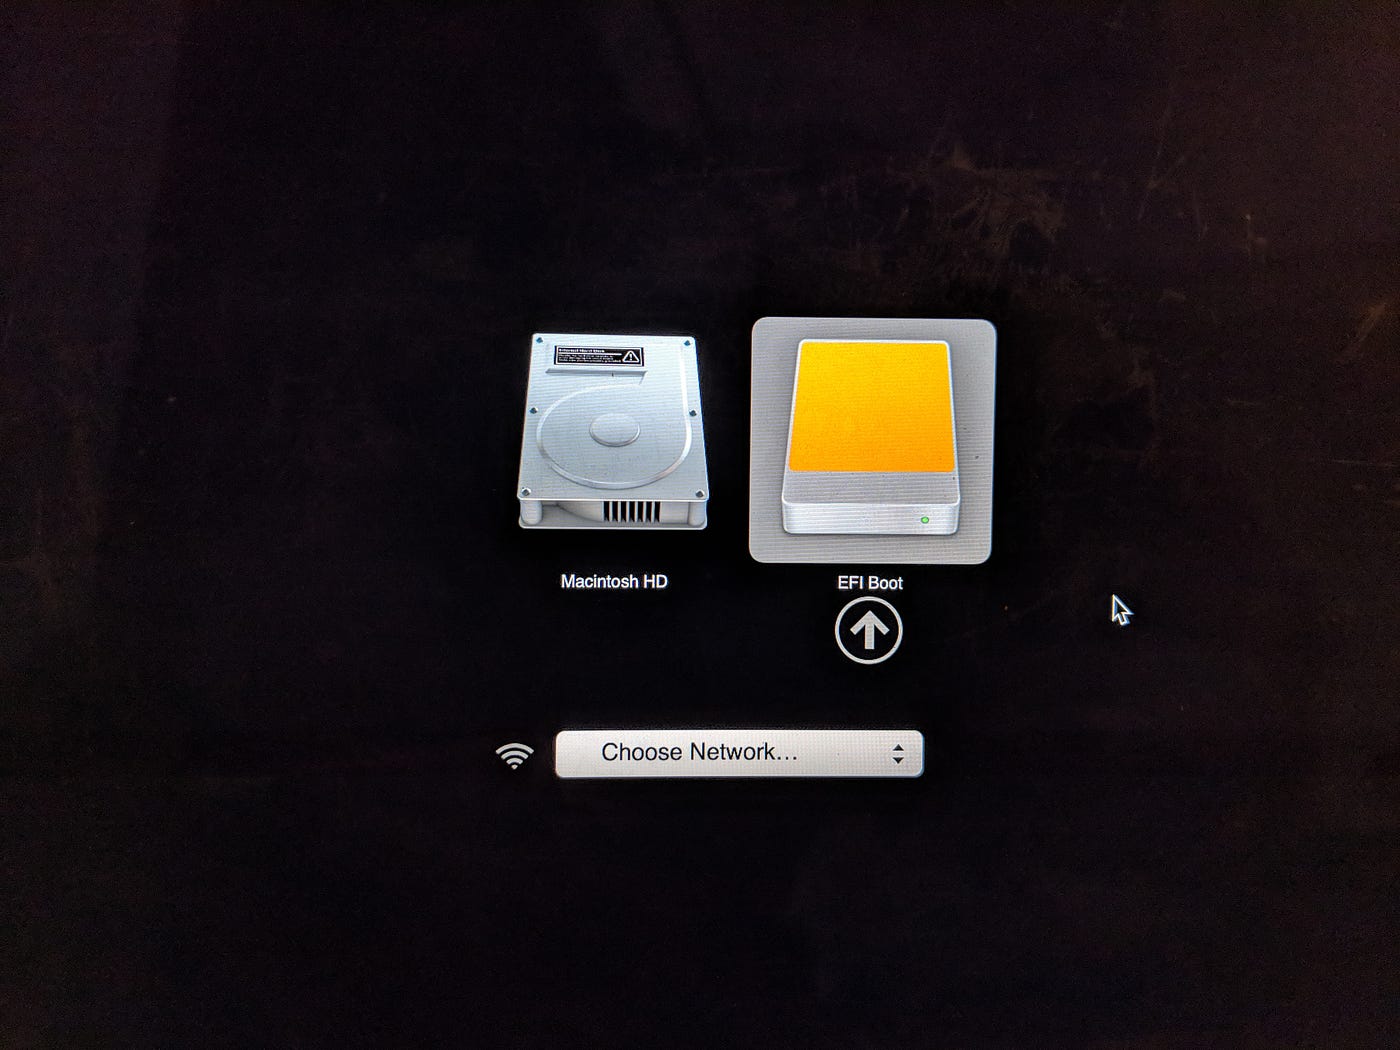
- Insert the USB Flash Drive, hold the option key and press the power button, this allows you to choose the Startup disk instead of booting right into the default disk
- Click on the EFI Boot, so it will be used as the Startup disk
- The blue Windows logo will show up in a few seconds, and you can continue the Windows Installation from here
- After the Windows installation is finished, you might find some hardware, like WiFi or Bluetooth, are not functioning properly. And it is due to missing driver installation in the Windows OS. Please insert the thumb drive and install the Windows Support software in this Windows workspace, this enables the Windows OS to utilize all the hardware inside the MacBook
Step 6 Enjoy Windows on MacBook
And that is it, you now have a working Windows OS running entirely from an external USB Flash Drive with your MacBook.
Enjoy the best of both worlds :)
How To Install Windows 10 On Mac With Bootable Usb
Source: https://zhangqichuan.medium.com/run-windows-in-your-macbook-from-an-external-usb-flash-drive-in-6-steps-9e6044ae8015
Posted by: kempimind1946.blogspot.com
0 Response to "How To Install Windows 10 On Mac With Bootable Usb"
Post a Comment